
See the following to help you get started with K2:
Log In To K2
After starting K2, the login screen is displayed.
-
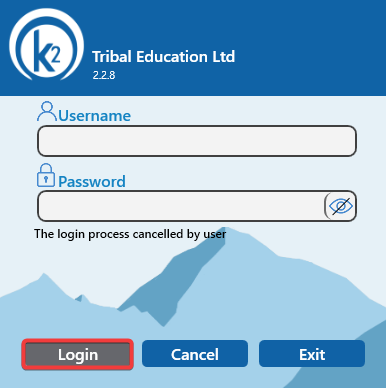
Check that the Login button is inactive.
-
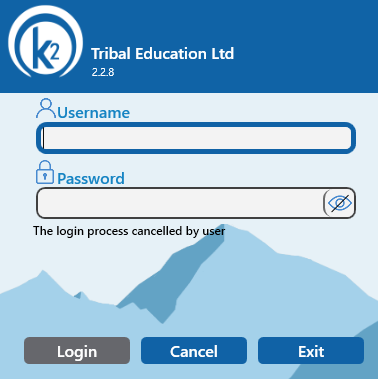
Check that both the Username and Password have a blue border displayed.
-
When the Username and Password details have been added the Login button becomes active.
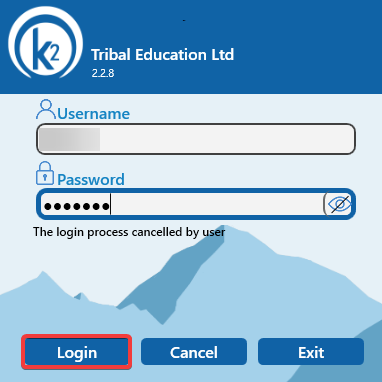
The Password can be viewed by clicking on the eye in the Password field.
-
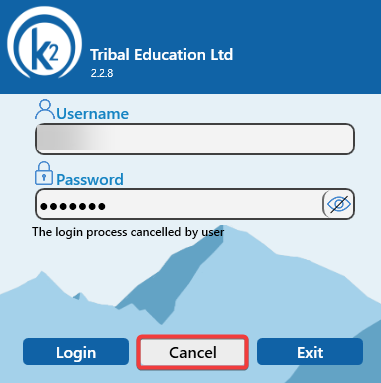
When placing the cursor over Login, Cancel, and Exit the button will appear white.
-
When the active button is clicked a blue border appears.
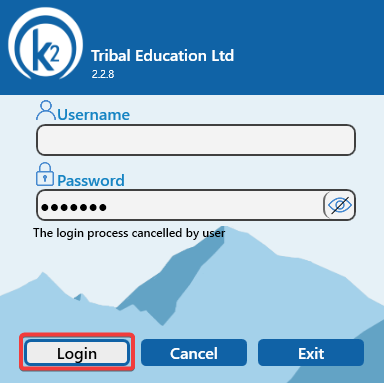
You can edit the display message by editing the Login Screen Message field in the Support Details section of System Options.
Change Your Password
You must change your password once logged in. To change your password, navigate to Tools > Change Password.
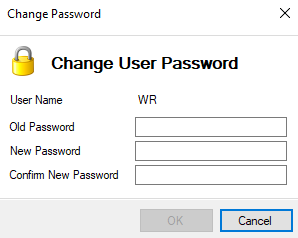
If you have a role with full User permission, you can also change other users' passwords. Refer to Changing a User's Password for further information.
If the password is required to be strong (as defined by the Enforce Strong Password option in System Options), it must contain at least three of the following:
-
Upper case characters (that is: A-Z)
-
Lowercase characters (that is: a-z)
-
Numeric characters (that is: 0-9)
-
Special characters (for example: #, $, !, @ and so on)
-
No sequences of three characters or more (for example aaa, 123, ABC, and so on)
It must also not be a previously chosen password.
Where the password has required a change, the minimum password value has been set to 8.
If the password value is less than the minimum, the following message is displayed.
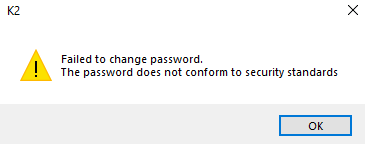
Where a password requires a change, and the password used has been compromised. The following message is displayed.
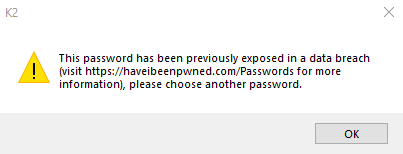
The password can also be changed from the login screen.
-
Click on Cancel.
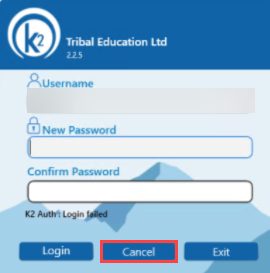
The New and Confirm Password fields are displayed.
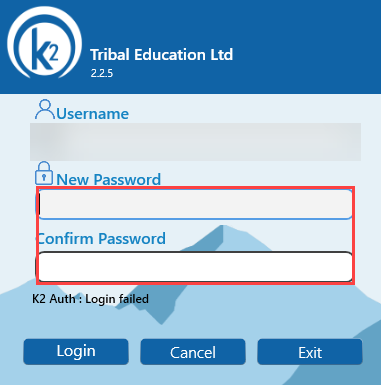
-
Click on Login.
The password will have changed and K2 opens successfully.
Use the Menus or Ribbon
The menus and ribbon are designed to help you quickly find the commands needed to complete a task.
They are organised in groups. Each menu or tab in K2 relates to a specific group of modules.
You can customise the menus or ribbon in the following ways:
-
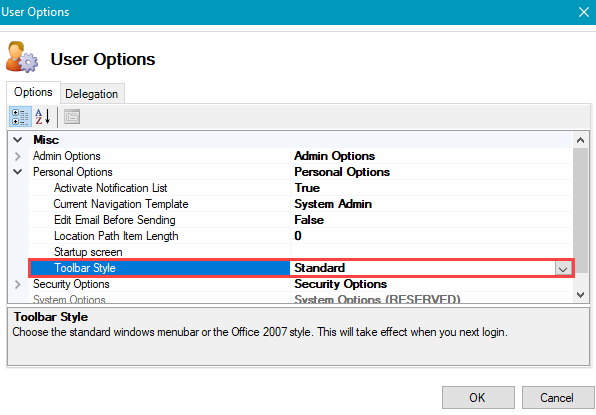
Select whether to display the Standard (that is: menus) or Office 2007 (that is: ribbon) menu toolbar by selecting from the Toolbar Style drop-down in User Options (accessed by navigating to Tools > User Options)
-
Enable or disable the Quick Access Toolbar by right-clicking on the ribbon and selecting or de-selecting the Show Quick Access Toolbar Below the Ribbon option.

-
Minimise or maximise the ribbon by right-clicking on the ribbon and selecting or de-selecting the Minimize the Ribbon option.

Archiving via workflow
You can archive various entities in K2. Some of these entities use a workflow to accomplish the archive process. The workflow process happens in the background and the user is notified of the outcome once the process is completed.
Room Merge also archive via a workflow.
To archive an item:
-
Search for and open the relevant record.
-
Click the Archive button.

The Archiving Information window is displayed.
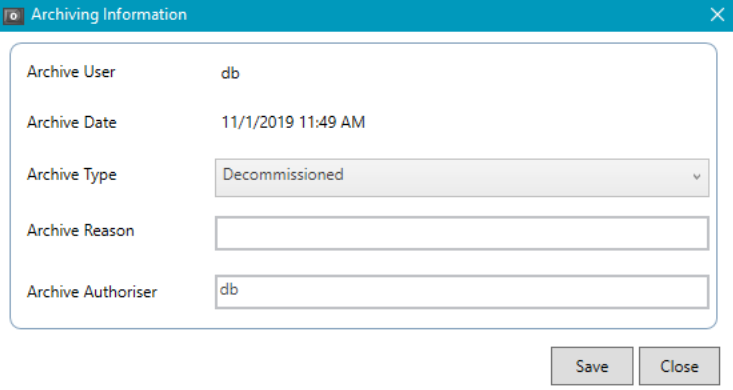
The fields on the Archiving Information window are described in the following table:
|
This field… |
Holds this information... |
|---|---|
|
Archive User |
Displays the name of the user archiving the record. |
|
Archive Date |
Displays the date the record is to be archived. |
|
Archive Type |
Displays the available archive types. The available Archive Types are Decommissioned, Disposed, Merged, Cancelled, Closed and Rejected. |
|
Archive Reason |
Displays the reason for being archived. |
|
Archive Authoriser |
Displays the person who can authorise and archive the record. |
-
Select the Archive Type and enter the Archive Reason.
-
Edit the Archive Authoriser field, if required, and then click Save.
-
The record will be marked as ‘Pending Archiving’ until the archiving process is completed.
‘Pending Archiving’ status will remain against a record and related records if the process fails to archive successfully. The record will continue to be considered a current/live record until it is completely archived.
The Archiving Information window is slightly different for an asset or component.
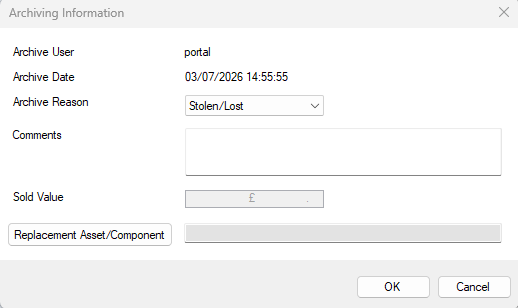
The fields on the Archiving Information window are described in the following table:
This information will appear on the Summary screen if the record is archived successfully.
|
This field… |
Holds this information... |
|---|---|
|
Archive User |
Displays the name of the user archiving the record. |
|
Archive Date |
Displays the date the record is to be archived. |
|
Archive Reason |
Displays the available archive reasons. The available Archive Reasons are Stolen/Lost, Other, Sold and Decommissioned. |
|
Comments |
Displays the reason for being archiving. |
|
Sold Value |
Displays the value of the sale. This field is only enabled when Sold is selected as Archived Reason. |
|
Replacement Asset/Component |
Displays the Asset or Component which is replacing the one being archived. |
-
Select Asset Reason and enter Comments.
-
If ‘Sold’ is selected as a reason, the Sold Value field will be enable so a value can be entered, if required.
-
Replacement Asset/Component can be clicked and an Asset Selector window displays so that a replacement can be selected, if required.
-
Click Save
A request for archiving is then submitted and queued on the application server, and the relevant workflow is run. If you have the Archive Notification role, you will receive a notification in the Notification List.
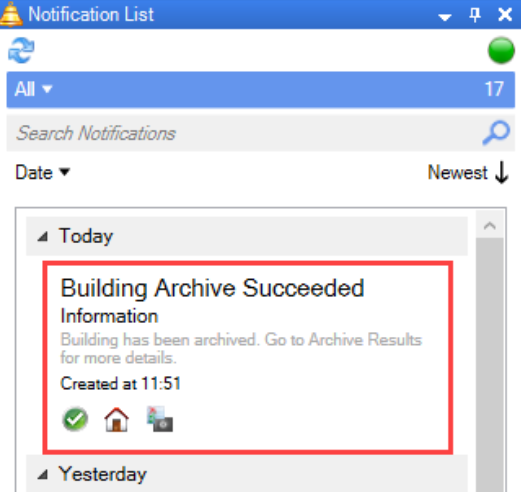
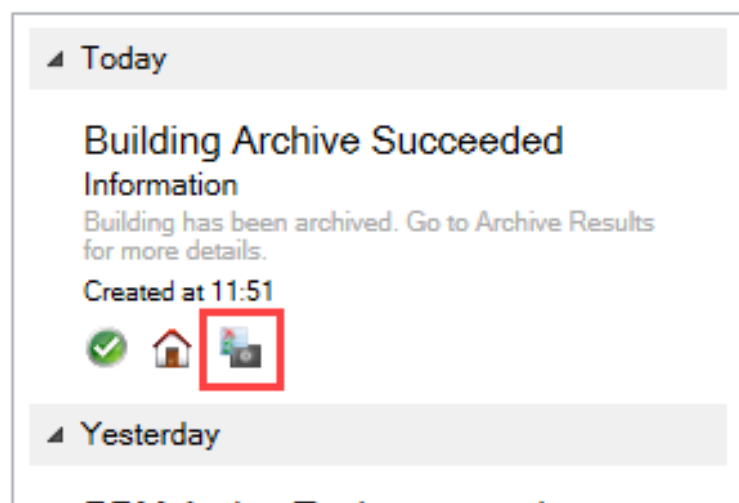
Clicking the Go to Archive Results button opens the Archive Results tab, which displays all child records archived as part of the process.
You will also receive a notification if archiving has failed.
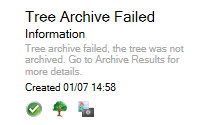
Archive Results tab will display the reasons why archiving failed. Once resolved you will be able to archive the entity by following the process again.
On occasion, you may receive a notification indicating that archiving has occurred with warnings. For example, a unit with a lease that isn’t current when archived will produce the message below.
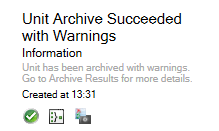
Archive Results tab will display with which related items have warnings and need to be resolved manually.

Records that are archived cannot be viewed in the navigator. To view these records, you must search for them.
Archiving via tick box or button
You can archive various entities in K2. Some of these entities use a tick box usually labelled Is Current or Current Record.
Condition Record, Lease and Purchase and Sales Ledgers are examples of this way to archive. When marked as not current, they are then considered to be archived.
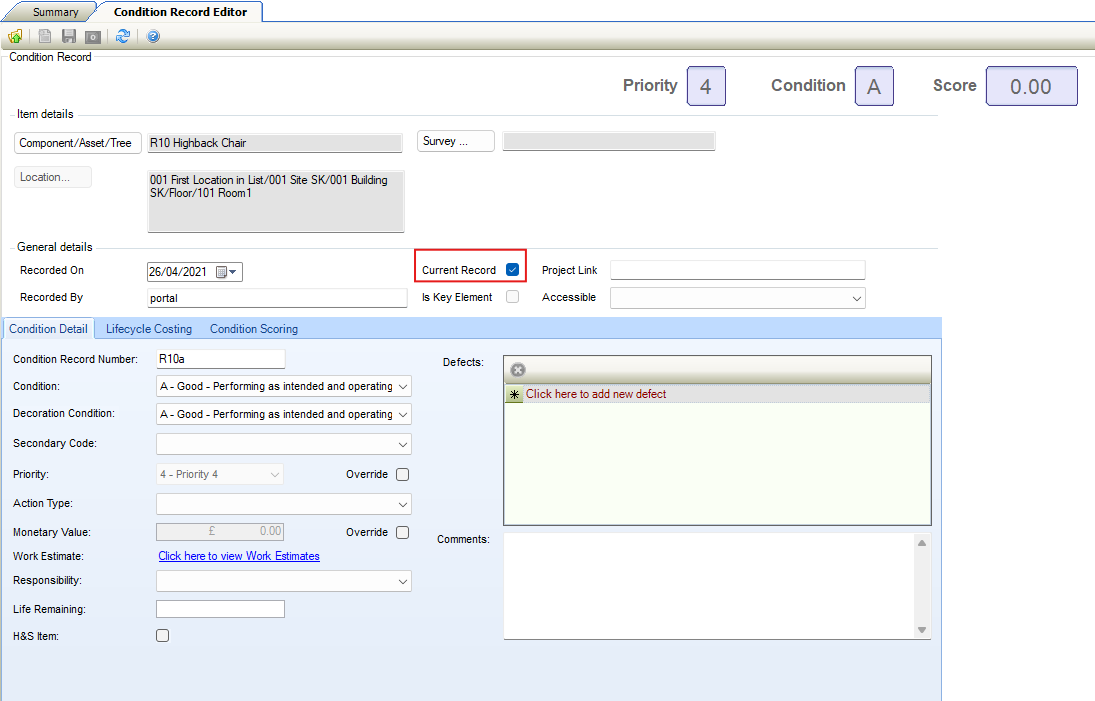
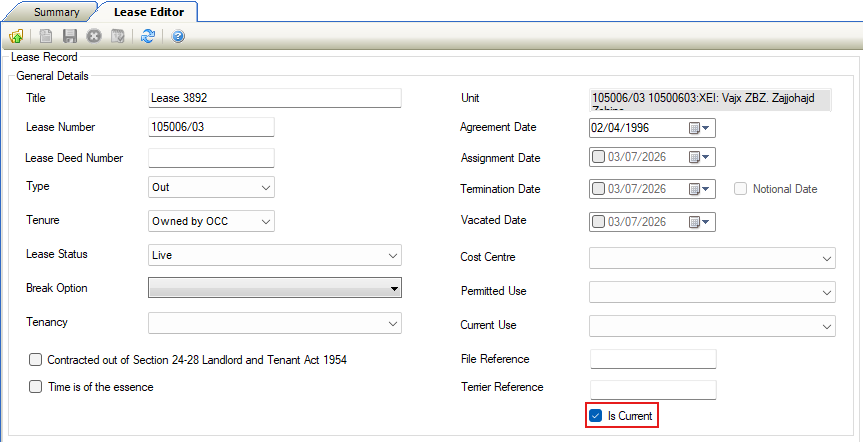
Or
You may see a tick box called Archived like on the Deed or Contact Editor
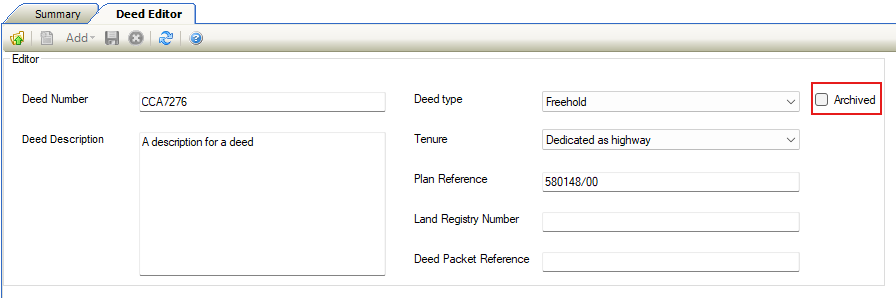
Or
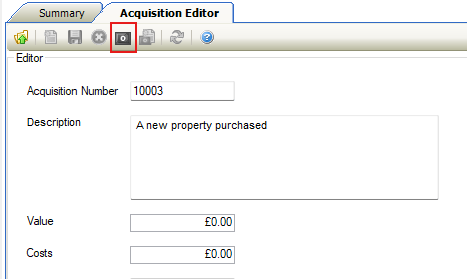
Alternatively some require the Archive button but do not have the Archive Information window displayed. For example: Agency, Consent, Correspondence, Disposal, Fire Risk Survey, Generic Audit Survey, Legionella Survey and PPM Task.
Keyis an example which uses the Archive button and Archive Information window but does not uses a workflow.
Archiving via status
You can archive various entities in K2. Some of these entities use Status to determine if it is archived.
Service Request Status (accessed by navigating to Services > Service Request Reference Data) can be classified as ‘Is Closed’. When this status is selected against a Service Request it will be classed as archived.
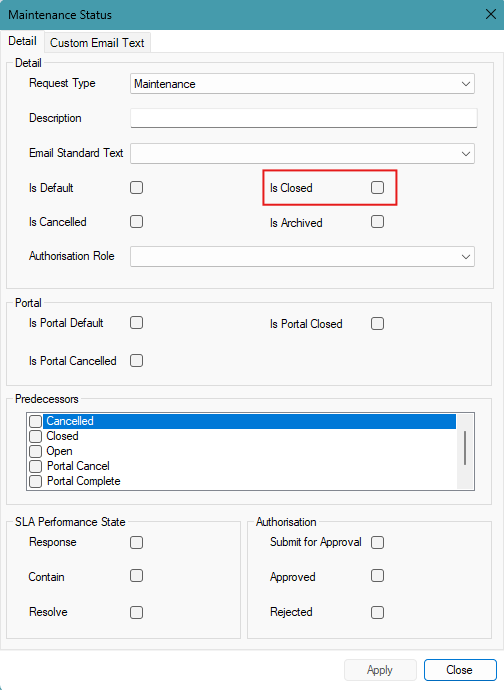
Orders/Order Variations, Purchase Orders/Purchase Order Variations and Incidents also use this method to archive records.
Managing Notes
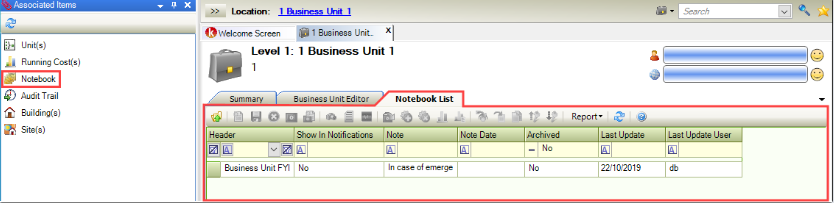
Most entities in K2 allow the saving of notebook entries. They can be managed in the Notebook List (accessed by selecting Notebook from the Associated Items panel when an entity is open).
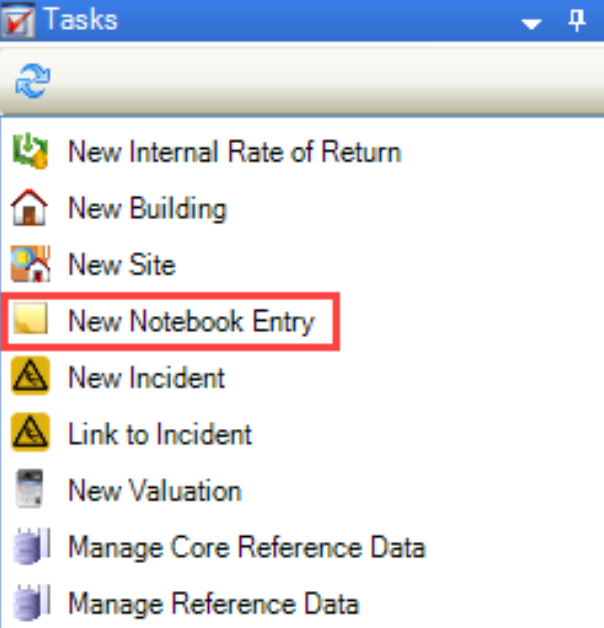
Notebook entries can be created by clicking the New Notebook Entry option in the Tasks panel.
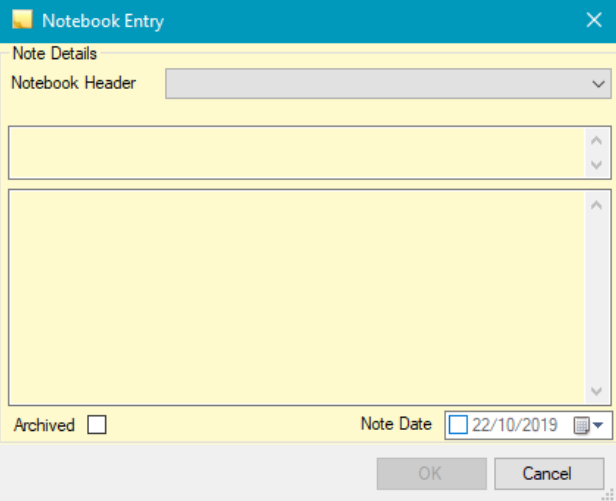
This displays the Notebook Entry window, where you can record the note details.
Note: The Notebook Header options can be managed in the Notebook Header Reference Data (accessed by navigating to Functions > Core > Reference Data > Core).
Audit Trail
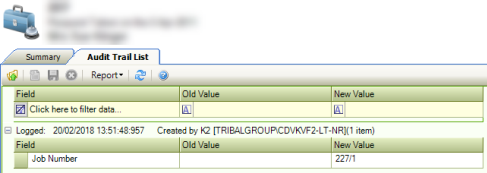
The Audit Trail List screen (accessed from Associated Items > Audit Trail) displays the audit trail associated with the current entity.
Maintenance History
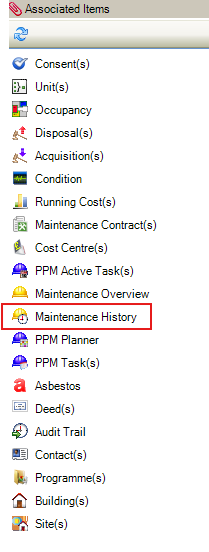
The Maintenance History screen (accessed from Associated Items > Maintenance History) displays the audit trail associated with the current entity. Maintenance History will appear in the associated items panel for any locations, Asset/Asset System or Component/Composite which have Maintenance, Jobs, Orders/Invoices/Credit Notes, Maintenance Contracts, Projects and/or Project Contracts linked to it.
-
Click to open Maintenance History grid.

Refer to Maintenance History for further details.
Related Topics
Click the links below to navigate to the following related topics: