
You can use Agency to help you do the following:
Archiving an Agency record
Refer to Archiving via Tick box or button for further details.
An agency cannot be archived if it is linked to active records. K2 will display a message for the reasons why the agency cannot be archived.

Once these are resolved the agency can be archived.
Linking a Purchase Ledger to an Agency record
An approved agency can be linked to a purchase ledger as long as it’s a contractor or supplier.
Either
-
Click Link Purchase Ledger button

Or
-
Select the agency in the Supplier/Contractor field on the Purchase Ledger Entry Editor.
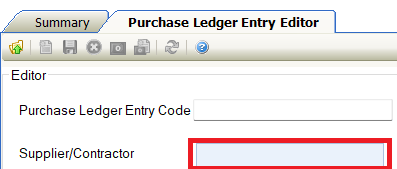
For details on how to complete the Purchase Ledger Entry Editor, please refer to Adding a Purchase Ledger Entry.
Other Tasks/Associated Items:
Assign Trades to an Agency
Use the Assign Trades screen to assign trades to an agency.

Once an agency has a trade associated with it, you can record labour rates for each trade in each labour rate band. Additionally, a contact linked to an agency can only be assigned trades that have also been assigned to the agency.
It can be accessed by clicking the Trade(s) item in the Associated Items panel when an agency record is opened.

Use the Add, Add All, Remove, and Remove All buttons to assign the relevant trades to the agency, and then click Save.
Linking Contacts to an Agency
Once an agency has been created and saved, you can link a contact to an agency.
You can also link a contact to an agency from a Contact Record.
To link a contact to an agency:
-
Search for and open the relevant agency if it is not already open.
-
Click the Link to Contact option in the Tasks panel.

The Select Contact window is displayed.

-
Select the relevant contact.
-
Click OK.
The contact is then added to the agency.
Once a contact has been added to an agency, the Contact(s) option is available in the Associated Items panel.

-
Click this to display the Contact List tab, which allows you to add more contacts to the agency.

Managing Agency Labour Rates
Once an agency has been created and at least one trade has been assigned, the Labour Rates option is displayed in the Associated Items panel (when an agency record is open).

Clicking this option opens the Labour Rates screen, allowing you to record rates for each trade against in each labour rate band.

These can be defined in Labour Rate Band Reference Data (accessed by navigating to Functions > Core > Reference Data > Core).
Managing Agency Working Hours
Once an agency has been created and saved, the Working Hours option is displayed in the Associated Items panel (when an agency record is open).

Clicking this option opens the Working Hours screen, allowing you to record the agency's working hours.

To log working hours:
-
Click and drag the start and end hours of the working hours for a day, and then right-click and select the relevant labour rate band.
These can be defined in Labour Rate Band Reference Data (accessed by navigating to Functions > Core > Reference Data > Core).

A block is added.

-
Repeat this process for all working hours.

Each type of labour rate band is colour-coded.
-
Click Save.
You can also remove a working hours block by right-clicking and selecting Remove Band Time.

Adding or Editing an Agency Event
Once the agency is saved, events can be created.
To add an event:
-
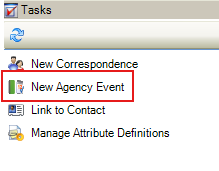
Click the New Agency Event option in the Tasks Panel.
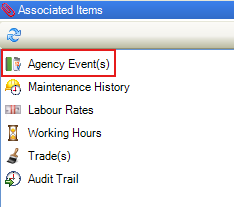
Alternatively, click the Agency Events option in the Associated Items panel and then double-click an existing record to open it.
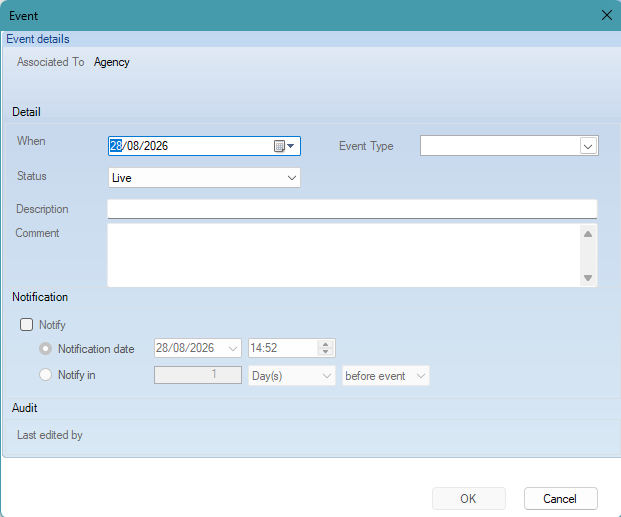
The Event window is displayed.
-
Enter or edit the relevant details.
The fields on the Event window are described in the following table:
|
This field… |
Holds this information... |
|---|---|
|
When |
The date of the event. |
|
Event Type |
The type of event to be created. Select from the drop-down list. This is a mandatory field. These can be defined in Agency Event Type Reference Data (accessed by navigating to Functions > Core > Reference Data > Core). |
|
Status |
The status of the event. Select from the drop-down list. |
|
Description |
A description of the event. |
|
Comment |
Any comments on the event. |
|
Notify |
Whether to send the user a notification of the event. Selecting this check box enables the remaining Notification fields, where you can select when to send the notification. Agency Events are added to the Calendar (navigate to View > Calendar). They do not generate notifications in the Notifications panel or generate a reminder pop up. |
-
Click on OK